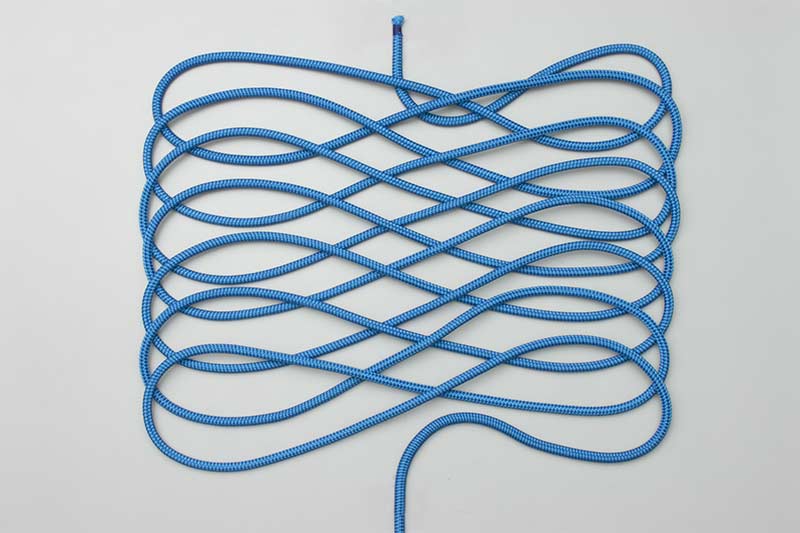
Arranges a rope neatly for fast and safe use.
Figure 8 Flake
Arranges a rope neatly for fast and safe use.
 |  |
 |  |  |  |  |
To Step use Arrow Keys (
Uses: Flaking a rope is to arrange it on the deck ready for easy use. The Figure 8 Flake (ABOK # 3110, p 517) allows the rope to be pulled rapidly off the deck with minimal risk of kinking, twisting, or knotting.
Flake vs. Fake: Both Fake and Flake are in widespread use. Advocates for one reject the other and vice-versa.
Applications: The Figure 8 Flake can be used: to lay out the furling line for a roller jib prior to unfurling the jib; to prepare an anchor rope before dropping the anchor; or to prepare a dock line to passing the end ashore. It is also the best way to store a hose on the ground.
Storing Head-phone Wire: Nelson Baietti describes how he wraps the wire between his index and pinky in the figure 8 pattern. Before he reaches what would be about the last two turns or so, he brings it only half way and wraps it tightly around the middle to hold itself. He then finishes it by passing the connection end loosely through the loop made by the figure 8 and this is enough to keep it from unraveling. It releases instantly when he pulls the connector from the loop.
Technique: If the rope is going to be released through a pulley or a jam cleat, don’t lay out the rope while twists still remain in it. Before making the Figure 8 Flake, start at the cleat and work your way to free the end shaking out any twists. Only then start at the end and lay out the rope in the Figure 8 Flake.
Acknowledgment: It is a pleasure to thank David Hoffman for detecting an error in my previous photography and for insisting that it warranted correction. He also suggested that when storing a hose, for example, the Figure 8 Flake would best be laid above the ground on two horizontal arms – with well rounded arcs. It would then be always ready for rapid deployment. I like it. I look forward to seeing it!
Variations: When using a long line in a confined area, a second layer of figure 8’s can be laid at right angles to the first. Care is required to avoid catching turns of the first layer.
Free End: The animation shows the free end unattached. Depending on the line being used, however, this end may need to be secured. For example, if it was a halyard being allowed to run out, securing the tail would be a sensible precaution.
